This guide was created as part of my search for a durable and secure solution to store my photos and videos. The solution described below is an interim solution to give me more time to find a solution that is even more suitable for me. For more background information read the post mentioned above.
Problem
Google Photos offered unlimited photo and video storage for free until 2021. Since then, if you use more than the free quota, you have to pay for the storage. However, there are exceptions for certain Google Pixel smartphones, which can still benefit from the former offer. This applies to compressed content, which is sufficient for my use cases.
I would now like to artificially extend the opportunity to use this offer. This means that I would like to use the offer with more devices:
- Use it on multiple devices at the same time
- Use it on smartphones that ar not Google Pixel smartphones
-> Until I’m ready to swing to my final solution 🙂
Solution
The idea is that on a central Google Pixel smartphone, that can use the unlimited storage option, Backup & Sync is enabled for Photos and Videos. All other devices disable Backup & Sync for Photos and Videos. Instead, they push the files to the Pixel via other means, from where they go to Google Photos. Read on for more details. Here is a conceptual diagram:
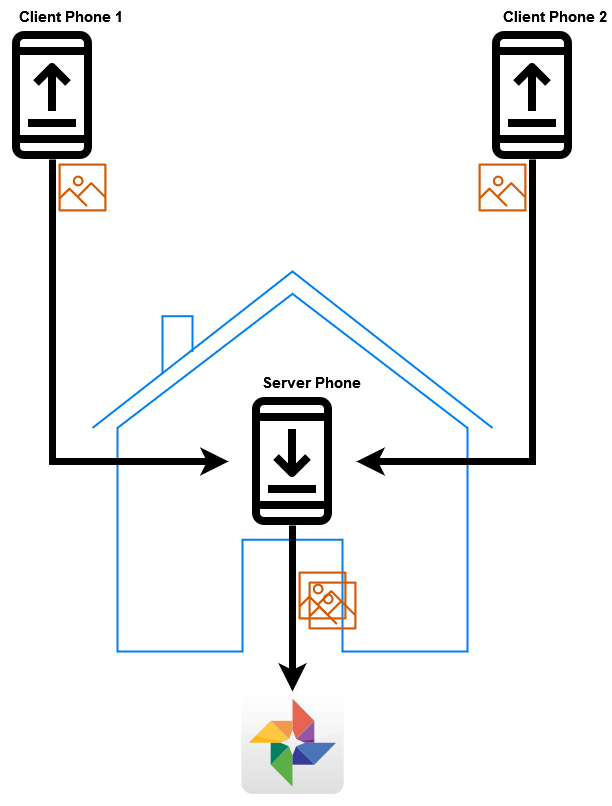
The Hardware
First of all, the most important thing: You need a Google Pixel smartphone that can benefit from unlimited storage. See the Google guide to find out which devices are supported. I use a Google Pixel 2. A used one is completely sufficient for that. You only need to be able to perform a few rudimentary steps during the setup. Wifi should work. The battery does not have to be much good anymore.
On the other hand, all you need are your “daily business” smartphones, with which you or members of your family take the photos that need to be backed up. It doesn’t have to be Android. However, I will only explain Android.
Terminology
Server/Server phone: The Google Pixel smartphone that is able to use the unlimited storage option. It works as a kind of aggregator, collects all the photos that need to be backed up.
Clients/Client phones: All your smartphones that you carry with you and which take the photos you want to be backed up. They publish their photos to the server phone that handles the backup.
Setting up the server phone
It would be the best to start with a freshly factory resetted phone.
Set up the Google account
Add the Google Account that should receive your photos and videos via Google Photos.
Setting up the connectivity
Connect to a Wifi that you want your server phone to be operating in. It is a good idea to give your server phone a fixed IP address.
Tidy up
I recommand to disable/uninstall all the clutter that comes with a fresh phone (like the Youtube app) and that is especially not needed on a server phone.
Setting up the client phones
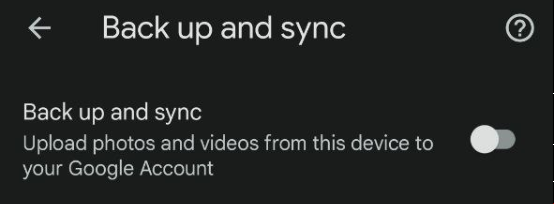
Disable Back up and sync for Photos and Videos (Settings -> Google -> Backup -> Photos and Videos)
Setting up the syncronisation between the clients and the server
After trying different ways to get the images from the clients to the server, I finally decided to use Syncthing. Among the alternatives tested before were server services on the server phone (e.g. via WebDAV Server app) to directly sync from clients to the server as well as 2 phase syncs with the help of a temporary storage (SMB/WebDAV/… mounts on a NAS or at a cloud service). Maybe there is something for you, but once again Syncthing convinced me in terms of stability and complexity.
Syncthing – Common setup on all devices
Install the app on the clients and the server.
Turn off battery optimization (you will for example be asked to do so when you first start the app).
Go to Settings -> Behaviour -> Start service automatically on boot -> Enable
Syncthing – Server phone setup
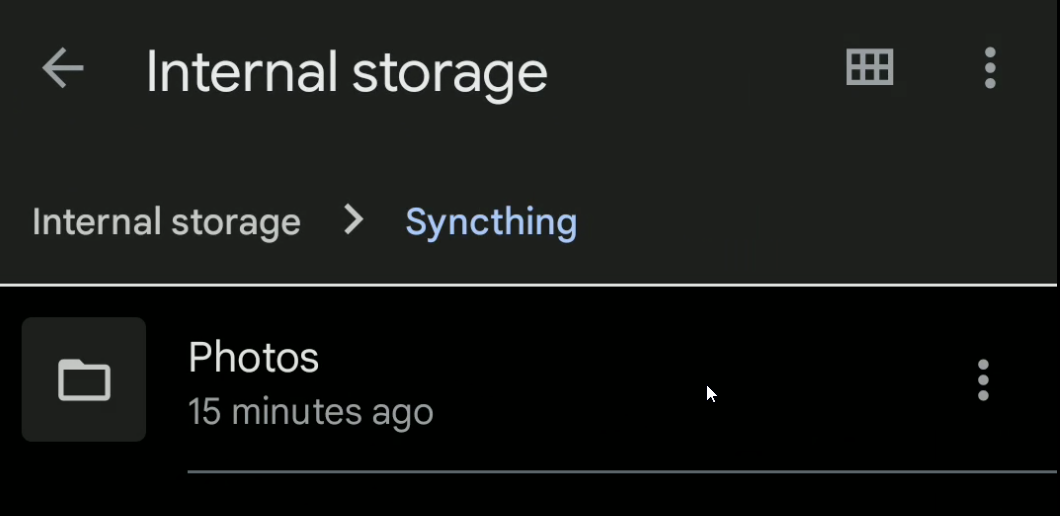
Using a file explorer of your choice create a directory where you want all the images to be stored. In my case it will be Internal Storage -> Syncthing -> Photos
Syncthing – Client phones setup
Optional: Go to Settings -> Run conditions -> Run on mobile data -> Enable
Syncthing – Configure the photo sync
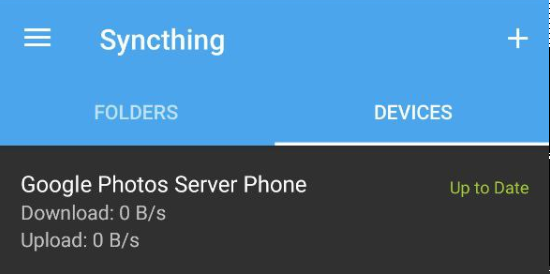
On the Server Phone show up the Device ID (Hamburger Menu -> Show device ID)
On the Client phone scan this ID (Main screen -> Add device -> Device ID) and accept the settings.
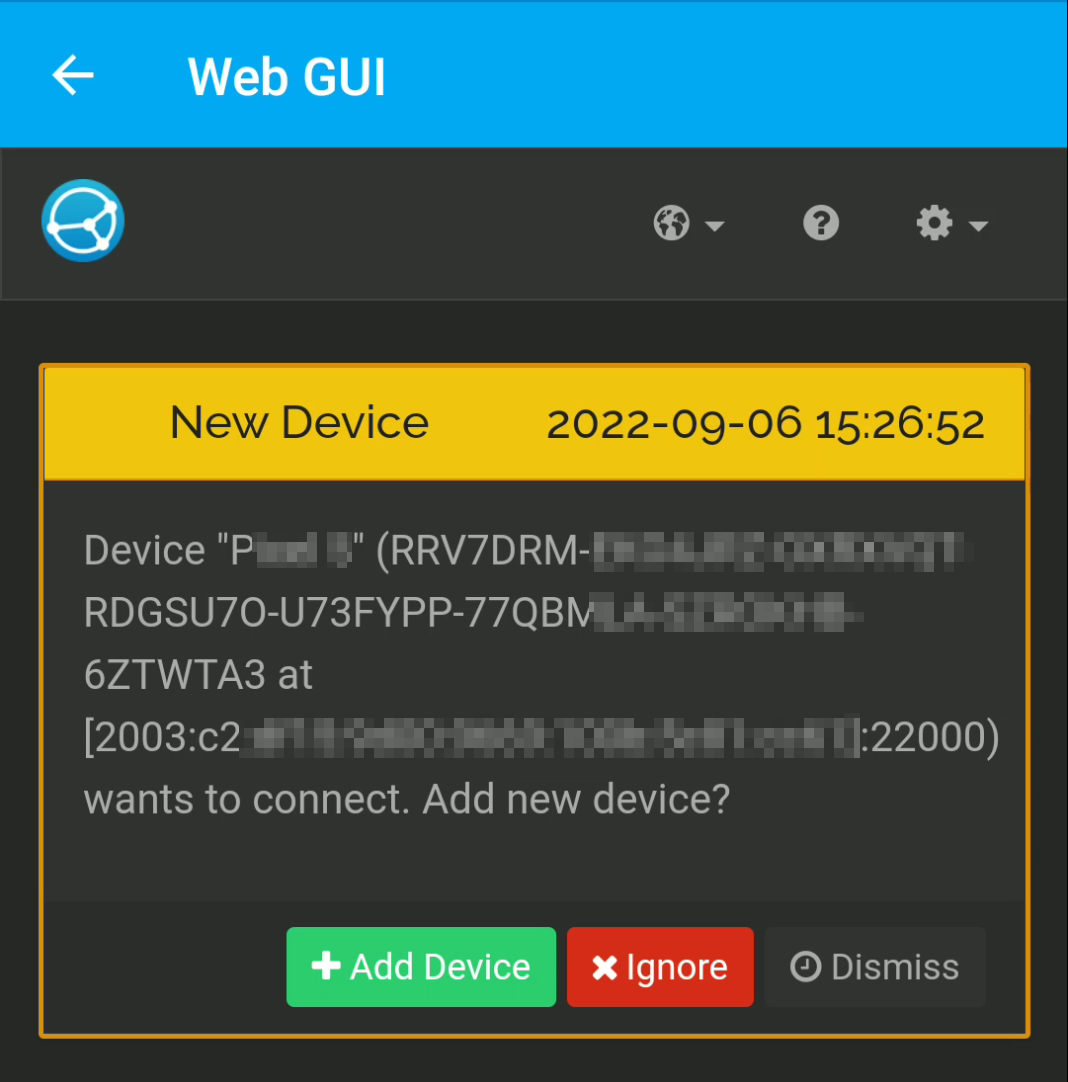
On the Server go to Hamburger Menu -> Web GUI to allow access to allow the clients attempt to add the server as new device. You shoud see a screen like this:
After hitting Add Device, under General, give it a name, leave all the rest as it is:

On the client you now see the Device enabled:
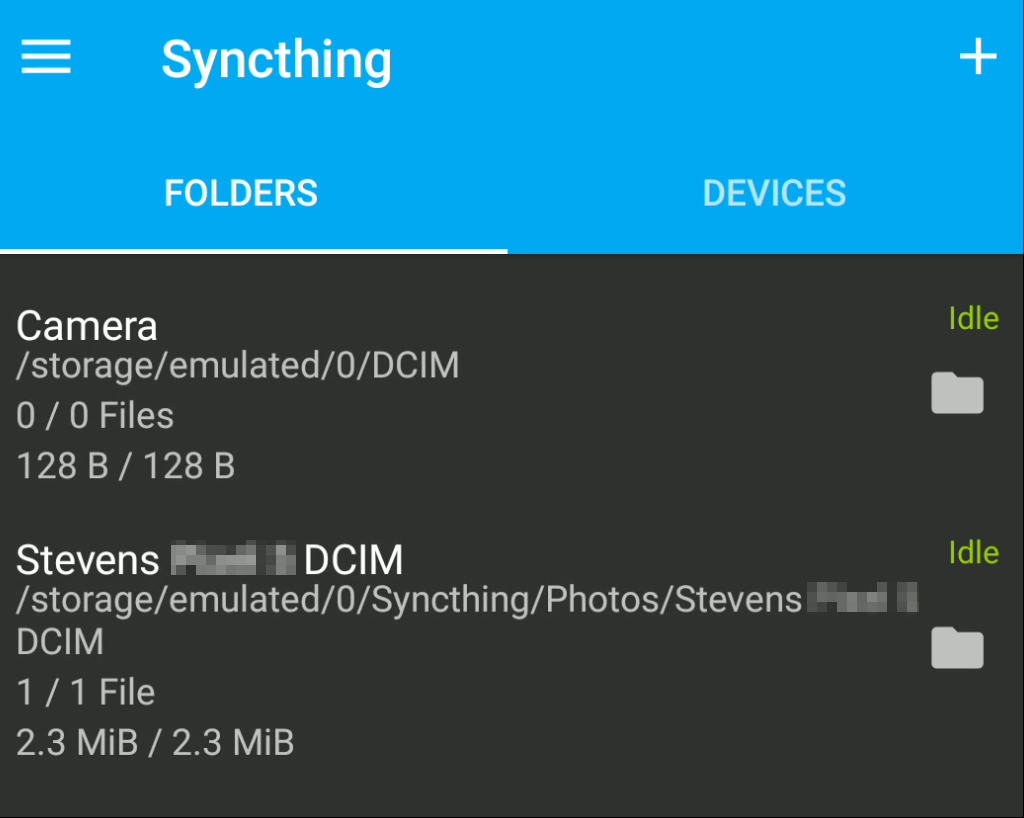
On the client go to Folders and hit the standard Camera folder, where you tick the box to sync it with the Google Photos Server Phone
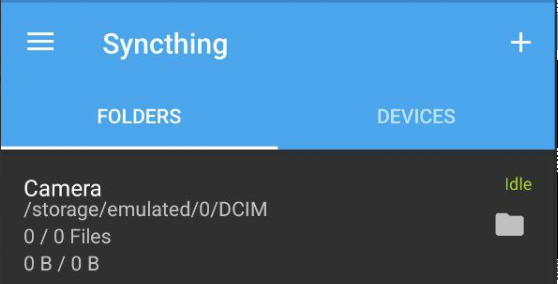
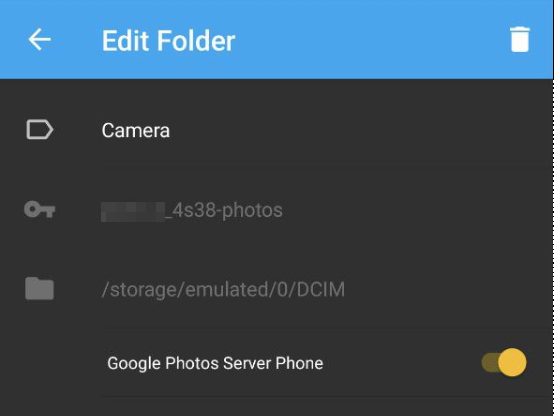
On the server go to the Web GUI and accept the folder sharing.

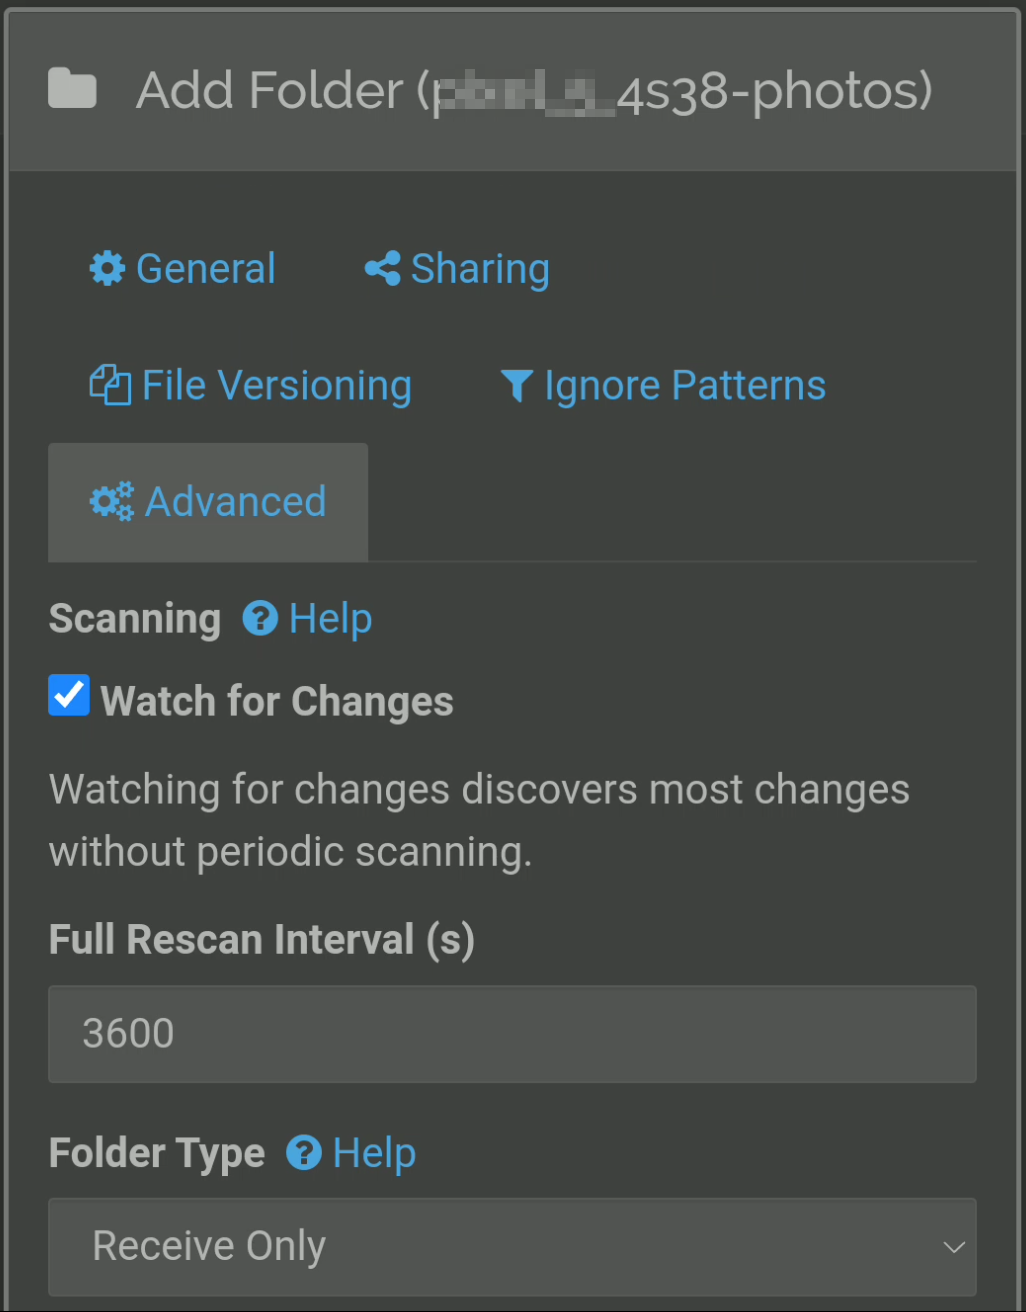
In General give it a distinctive label and choose the path where to store the images.

Under Advanced make this folder a Receive Only type. We don’t want to sync back and forth, only one direction to the server.
On the server see the newly added client folder:
Final tasks after Syncthing was configured
Make a photo on your client device so that there will be the first sync to the server.
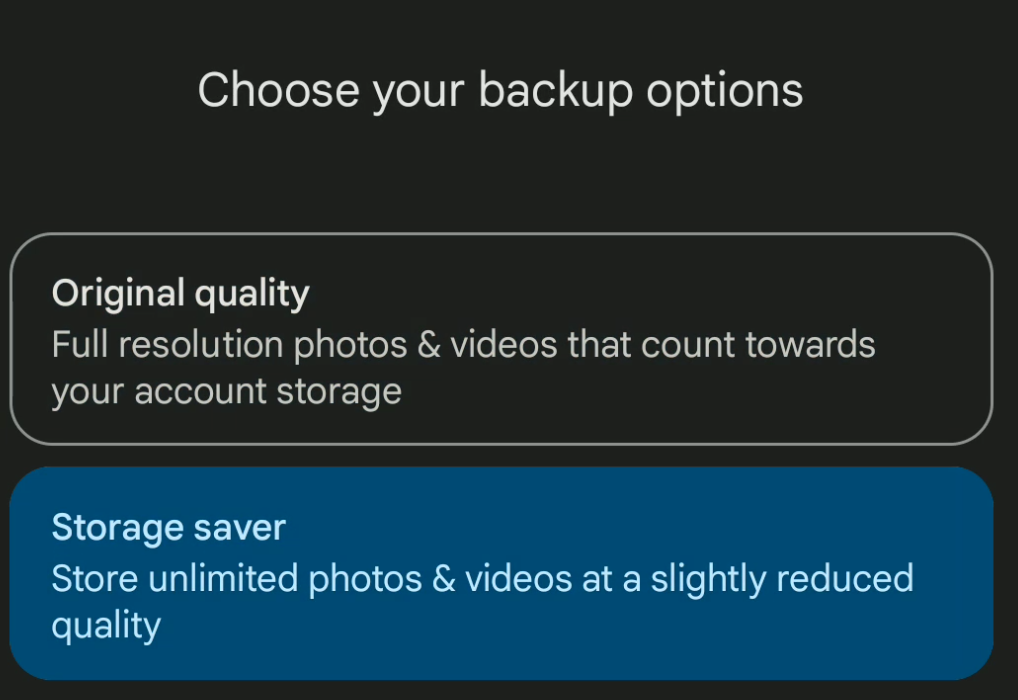
On the server enable Backup to Google Cloud (like when opening Google Photos for the first time), choose Storage saver optoin as this is the free option:
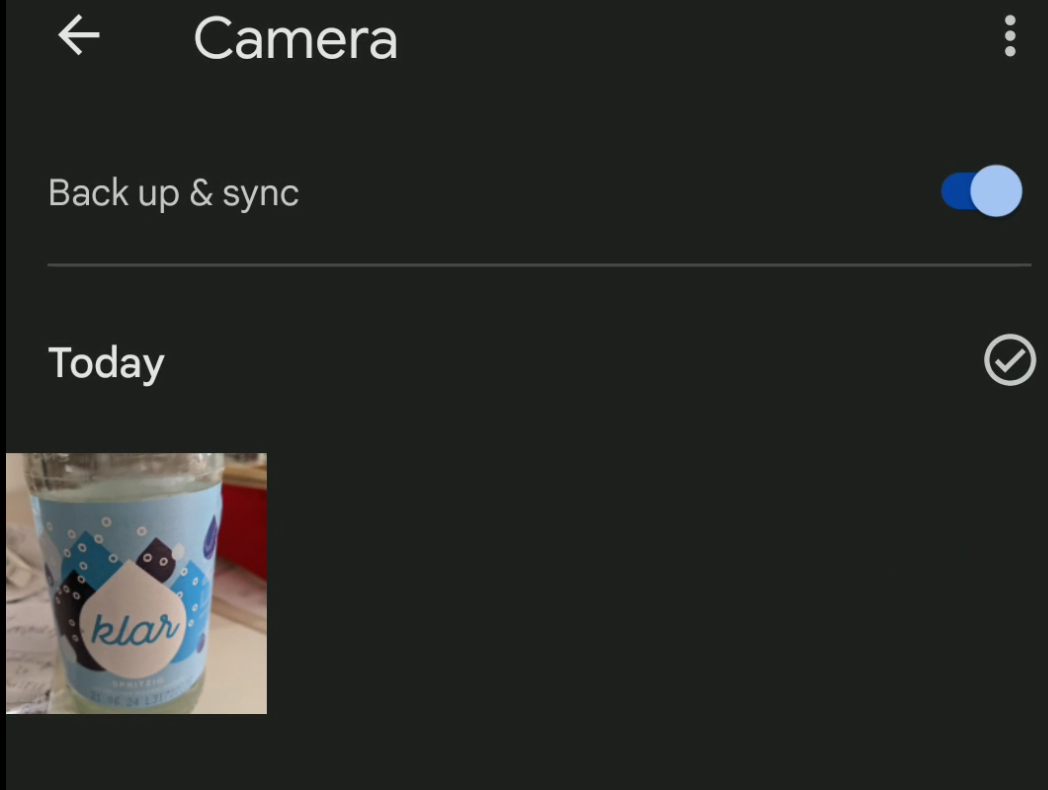
Then in the Google Photos app find the newly visible folder that contains the photo taken by the client:

Enable backups for this folder:
Now thats it so far for the basics. Repeat that for multiple devices and you’re good to go.
Power supply
Ultimately, our server smartphone needs electrical energy to perform its services. So it needs to be charged at least from time to time. I decided against charging the smartphone 24/7 to avoid putting the battery under unnecessary stress. So my smartphone sits behind a smart plug, which greatly reduces the charging time in total. This can be used to create any number of complicated charging scenarios. Two basic approaches:
- Time-controlled charging cycles.
- Charging cycles dependent on the state of charge.
Personally, I opted for a very banal time control in the first step. The smart plug is programmed to turn on once a day for one hour. That’s enough, even with a somewhat weaker battery. The discharge due to the few tasks that the smartphone has is just very low.
Instead, however, you could just as well use an automation tool to monitor the battery’s state of charge and use this to switch the adapter on or off. For example, with MacroDroid and two triggers (battery < 10%; battery > 90%) that execute actions such as an HTTP request or send a UDP command that interact with the home automation.
Syncthing resilience (optional)
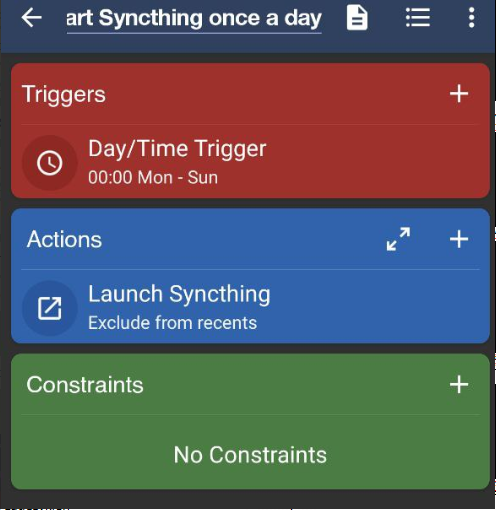
Even though I could not detect such a problem after a few days of testing: It might happen that the synchronization comes to a standstill in the future, because Syncthing did not start after a restart of the client/server or Google made sure that Syncthing was killed on the server to save the battery (despite a suitable granted exception). To prevent this, I decided to install an automation on the clients as well as on the server, which starts Syncthing once a day. The whole thing by means of MacroDroid:
- Trigger: Once a day
- Action: Launch Syncthing
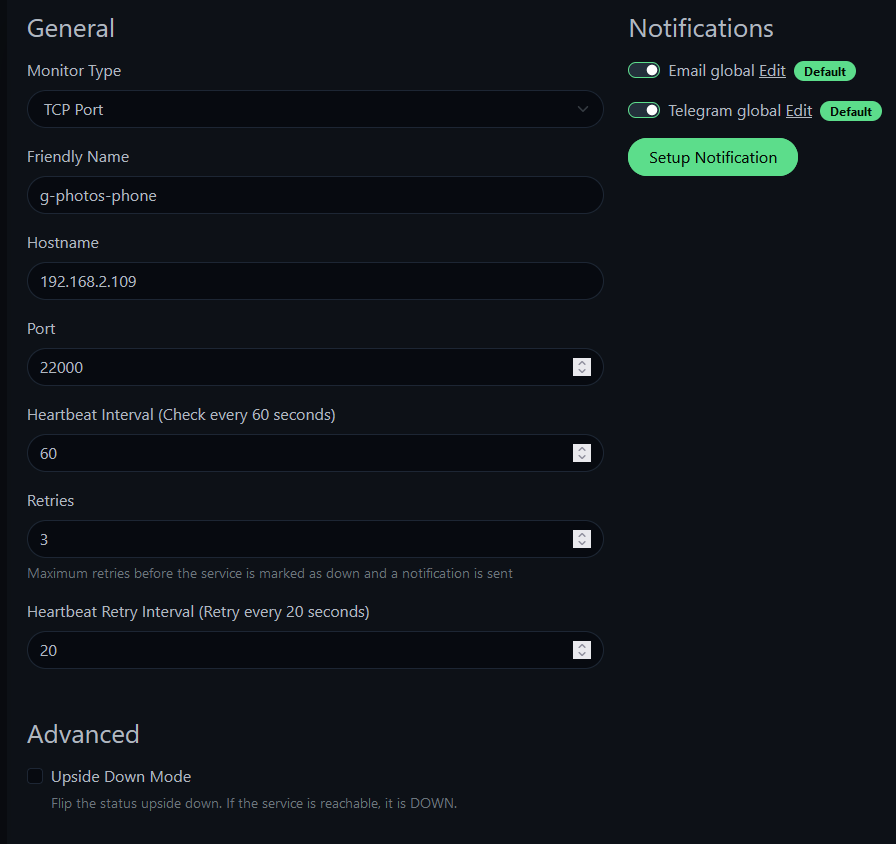
If you are paranoid enough like me, you can add availability monitoring on top. I run an Uptime Kuma instance in my home lab that I can teach to monitor sync port 22000 (TCP):
Broadband synchronization outside the home Wifi (optional)
Syncthing works especially performant if the devices to be synchronized are in the same network. But if now our clients generate snapshots from vacation, how exactly does it work? Basically, synchronization will still take place, since so-called relaying is allowed by default. This means that your devices can find each other across the boundaries of their own network via a clever mechanism. However, connections via relays are not broadband. Therefore, you will find that synchronization is accomplished in a few KBs. Therefore, you may wish to have more power available here. Then it’s best to see if you want to work with classic VPN connections (like OpenVPN) or if you like to use other virtual network solutions (like Zerotier). Both are possible, depending on your taste. I decided to use only the mechanisms that Syncthing provides, because fast synchronization is not important to me.
Remote control solutions (optional)
If you keep your smartphone somewhat inaccessible or have to include folders in the sync frequently, it might be a need to control the smartphone using remote control software.
For my part, I can manage without such software for the time being, even though I have to admit that I have at least looked for one before. However, according to my research, there was no free and open software that works according to my requirements:
- Constantly (even after a reboot) accessible via Wifi
- Control via browser